
Liquid Damaged Macbook ? Here's what to do
Blog
March 21, 2023
Liquid Spilt on Macbook ? What to do.

Liquid damage on MacBook is a very common Mac disaster. Don’t worry. Follow this step-by-step guide to save your liquid spill MacBook or reduce the repair cost significantly by doing a few simple easy to follow steps.
MacBook water damage is doable—however, if you are a novice, read this entire post to ensure you don't get in over your head. Beware of any advice telling you to simply allow it to dry on its own ; modern MacBooks have many components that can be damaged by a spill. This guide will explain all you need to know about MacBook water damage, and help you to minimize the damage.
Table of Content
- Turn off your Macbook immediately
- Disconnect Charger or any external connection
- Lay Macbook upside down
- Clean visible liquid with soft fabric or paper towel
- Remove back cover
- Disconnect Battery connection
- Dry Logic board with paper towel
- Tooth brush & 99% Isopropyl Alcohol.
- Dismantle Logic Board - Advanced level
Turn off - force shutdown your Macbook immediately
If you spilled water or any drink on your MacBook while it was on, you need to turn it off immediately. This is the first thing you need to do.
Hold down the power button for at least 10 seconds until the power is off, and then release the button. The faster you cut off the power, the safer your MacBook will be to recover.

Disconnect Charger or any external device connected
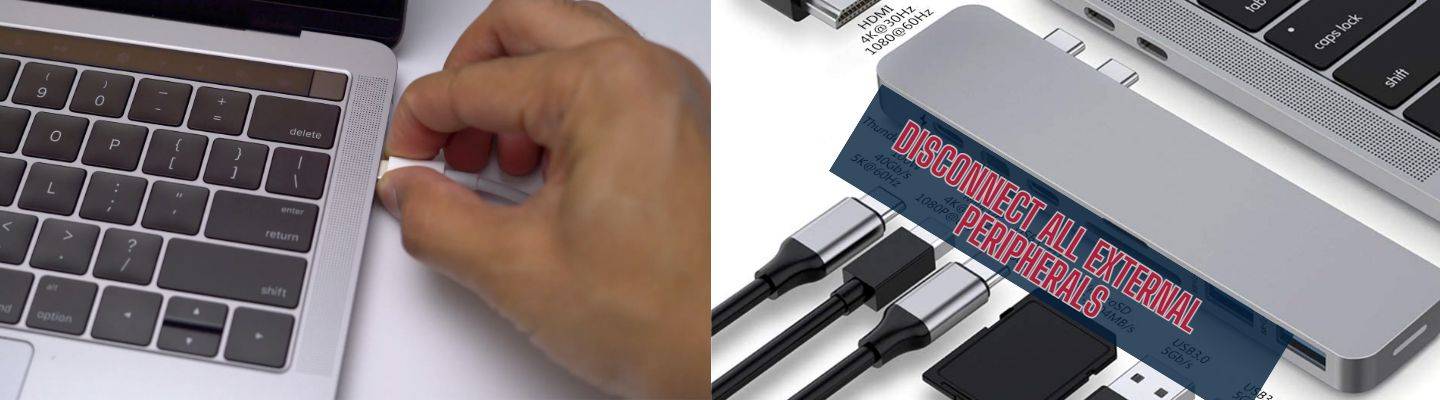
If your MacBook is connected to a charger, unplug the charger now. You effectively turn off the MacBook’s charging circuit by unplugging the charger.
Unplug all the external peripherals connected to the Mac saving it from possible short circuiting
At this stage the mac is only powered by battery which has to be disconnected. Will show you in step 6.
Clean & Lay your Macbook upside down
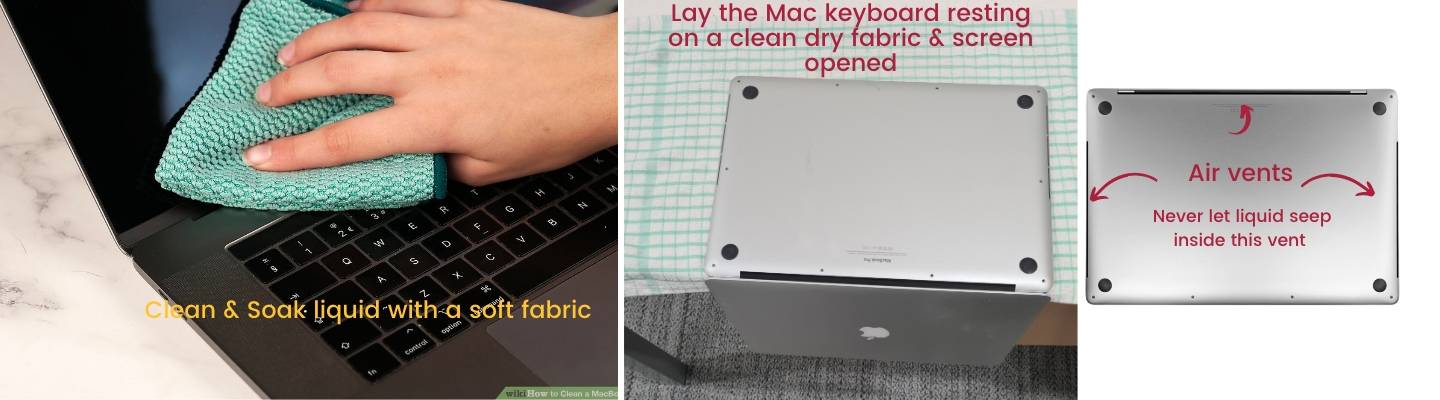
Use a paper towel or cotton fabric or a soft towel to absorb the water on the keyboard, trackpad and touch bar. You may use a microfiber cloth to absorb liquid without scratching your MacBook screen or the touch bar.
Pay attention to the vent holes. Don’t let any liquid enter the vent holes while cleaning the top case and screen.
Thoroughly clean the vent holes using a a cotton swab if needed, then the USB ports, charging port, Thunderbolt port and HDMI port.
Put a cotton fabric or a thick soft towel under the MacBook to absorb any liquid left on the bottom of the MacBook.
Once all the exterior is dry, Place a dry soft towel on the keyboard and place the macbook as shown in the image, keyboard laid flat on the table with dry towel and the screen hanging down.
This is to make sure water doesn't enter the screen at any cost, as the screen is not waterproof.
Remove Back Cover
Step 1
Most newer Macbook Use a P5 Pentalobe driver or older mac use Phillips head screwdriver to remove six screws securing the lower case.
Throughout this repair, keep track of each screw and make sure it goes back exactly where it came from to avoid damaging your device.


Step 2
For Macbook models starting from 2016 you might need to use suction cups to slowly pull the back cover
Disconnecting Battery - Macbook 2016 & Latter Models
Step 1
Peel the rectangular board cover
Peel up and remove the large rectangular battery board cover, on the edge of the logic board nearest the battery.
If the cover doesn't peel up easily, apply mild heat with hair dryer, or heat gun to soften the adhesive underneath, and try again.


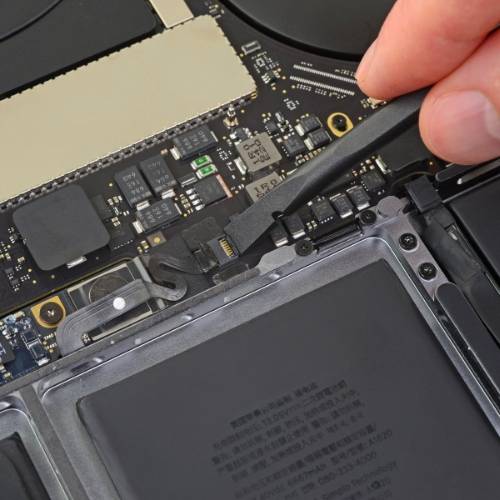

Peel and disconnect the Battery data cable
Step 1
Peel back the tape covering the battery board data cable connector.
Step 2
Use a Spudger to gently pry up the locking flap on the ZIF connector for the battery board data cable.
Step 3
Slowly pull the battery data cable from the ZIF connector.
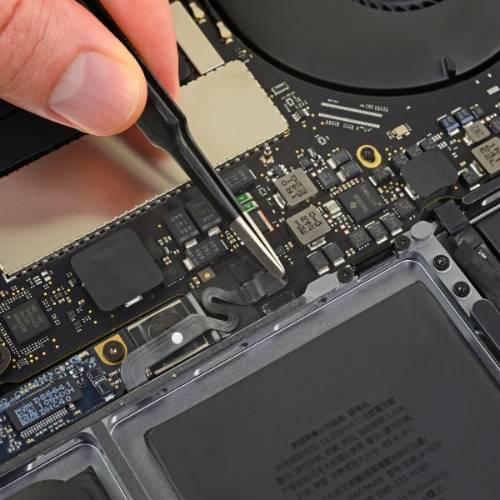
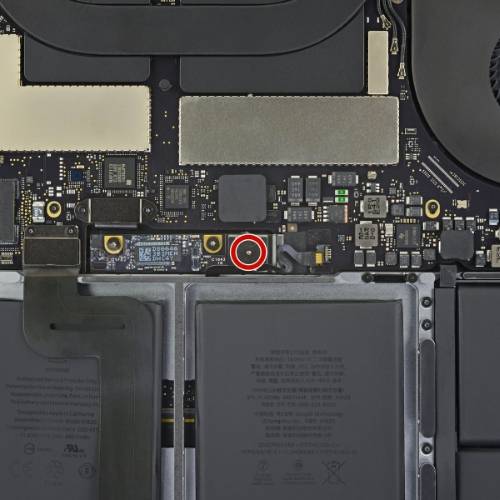
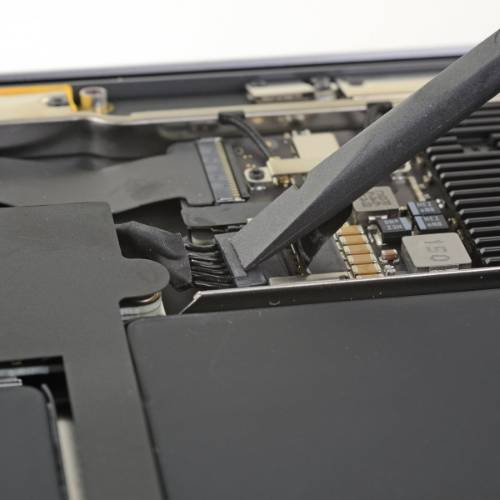
Disconnecting battery power connector
Step 1
Use a T5 Torx driver to remove the screw securing the battery power connector circled in red in the image.
Step 2
Use a spudger to gently lift the battery power connector, disconnecting the battery.
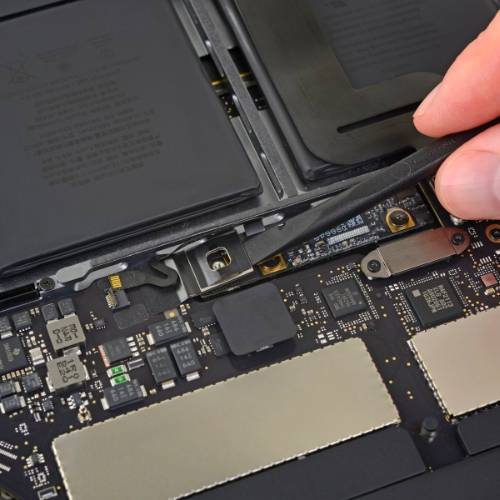


- Peel back the sticker covering the battery connector.
- Gently lift each side of the battery connector to pry the connector out of its socket on the logic board.
Disconnecting Battery - Macbook Air
For Macbook Air 2017 & Earlier
Grab the clear plastic pull tab attached to the battery connector and pull it parallel to the board toward the front edge of the Air.
For Macbook Air 2018 & Latter
Use a spudger to slide the battery connector parallel to the logic board and out of its socket on the logic board.
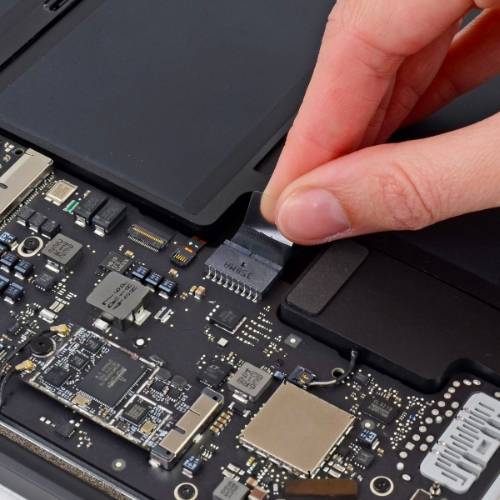
Logic Board Cleaning

Now you can focus on drying the components inside the MacBook.
Use a combination of micro fiber cloth, cotton swabs or paper towel to absorb the liquid on the logic board, battery, trackpad, speakers, CPU fans and heatsink. A soft drink may leave a sticky residue on the logic board. So use alcohol and a tooth blush to remove it. Take extra care while using Alcohol and tooth brush, while not to knock off any soldered components be gentle and scrub off any sticky residue.
Now you can use Hair dryer to dry excess Alcohol off the Logic board.
(Also note: Through out this above cleaning steps Macbook should be laid on a table as mentioned on the step 3 take extra care to avoid liquid getting in to the screen)
Macbook Logic Board Disassembly - Only for advanced user
If you believe that the liquid might still be on the back of the logic board, than the logic board has to be dismantled to clean thoroughly which we would not recommend a novice user to do so. Normally a professional Apple technician would use combination of tools like Ultrasonic cleaners & electric oven's to professionally clean them.
The logic board disassembly process might take 1 to 2 hours involving use of multiple screw drivers. Tweezers & Spudgers etc. A short youtube videos are given below if you wish to do so on your own discretion.
Macbook Pro 15 2016 & 2017 Logic board diassembly
Macbook pro 15" 2015 & Earlier Logic board disassembly
Macbook Air 13" 2020 Logic board disassembly